When is new blockwork ready for rendering?
When is new blockwork ready for rendering?
The final block going into an extension does not automatically make the wall ready for its finish. The render system needs a suitable background, and the surrounding construction needs to be far enough advanced for its details to work. A short, documented handover between builder and renderer helps prevent the decorative stage being used to hide unfinished decisions.

On this page
Start with the specification for the actual blocks
Keep the masonry information and the proposed render specification together. The contractor needs to know what the wall is made from, not simply that it is blockwork. Different backgrounds can require different preparation, and the chosen product's instructions govern the relevant conditions. Avoid assuming that advice for a similar-looking block on another project applies unchanged to this one.
The drawings may not show every alteration made during construction. An opening might have moved, a service chase may have been filled or part of the wall may use a different material. Mark those areas before the surface is covered. They are not necessarily problems, but they are information the specifier needs when deciding how the render will be supported across the elevation.
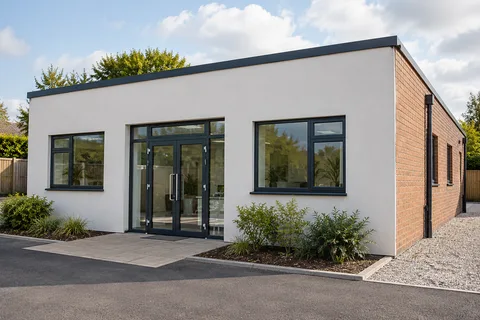
For wall rendering, define the whole face and its returns. A neat rectangle of blockwork in a photograph may conceal incomplete reveals, awkward side junctions or an unfinished wall top. Include those details in the readiness check. The renderer should not be asked to begin on the large flat area while the only possible route to completing its edges remains undecided.
| Part | Record before acceptance |
|---|---|
| Background | Block type, alterations and completed repairs |
| Interfaces | Windows, roof edge and service penetrations |
| Movement | Joint positions and responsible design |
| Finish | Supported build-up and approved sample |
| Programme | Readiness, protection and inspection stages |
Check what the builder is handing over
Inspect the background for incomplete joints, protrusions, damaged areas and temporary fixings that conflict with the proposed finish. Record the items requiring attention and who will resolve them. The aim is a clear handover condition, not a dispute over which trade can make an imperfect wall look acceptable. If levelling or other preparation belongs in the rendering package, describe it explicitly.
A wall that feels dry at the surface may not meet every readiness requirement. Weather, construction moisture and the selected material all matter. Follow the relevant system guidance and professional assessment rather than choosing a universal waiting period from an unrelated job. The programme should allow the actual background to become suitable, including any repairs completed shortly before rendering.
Keep the inspection accessible. Date the photographs, label the elevation and list the outstanding points beside them. Once those points are resolved, record the acceptance of the background. If a contractor is asked to work around an unresolved area, agree the resulting boundary and later completion method. Do not let a verbal request become an unexplained joint through the finished wall.
Finish the opening and roof details on paper first
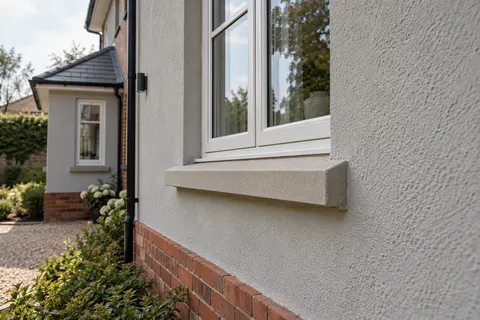
Window sills need to suit the completed wall thickness. Confirm their projection, drainage and junction to the frame before surrounding work makes alterations difficult. The same applies to doors, vents and service penetrations. A small amount of extra render can still affect a detail that had very little allowance in the first place.
At the roof edge, check how the finish meets the eaves, verge or other weathering arrangement. Temporary roofing details should not be mistaken for the completed design. If another trade needs to return, set out the sequence and the protection required for any finished surface. The rendering programme can then reflect that dependency rather than assuming all interfaces are already complete.
External wall insulation requires a more extensive coordination exercise because it moves the outside face appreciably. If the project may include insulation, resolve that before approving render-only sill and roof details. A late switch can change several completed items. Compare the complete design and sequence, not just the availability of space to attach boards to the blockwork.
Confirm joints and reinforcement locations
The designer should identify required movement joints and the way they continue through the finish. A joint shown in the masonry design should not disappear because a continuous surface is preferred visually. Discuss its position on the elevation while there is time to coordinate the appearance. Reinforcement and movement accommodation have different roles and should not be described as interchangeable.
Openings and changes in background may require details within the selected system. Ask what needs inspection before the base coat or finishing stage conceals it. Where photographs are required, include an elevation reference so the records are useful. A close-up of mesh without a location cannot demonstrate that every specified part of the wall received the correct detail.
If the wall has been built differently from the drawing, refer the discrepancy back to the responsible designer. The render contractor may identify the problem, but that does not make them responsible for redesigning the structural junction. Keep the agreed resolution with the project documents so subsequent trades do not accidentally undo it.
Select the finish after readiness is understood
Monocouche rendering can be suitable on specified prepared masonry, but the one-coat description does not remove background checks or necessary preparatory stages. Silicone rendering also relies on a supported build-up beneath its decorative coat. Compare the proposed systems from the wall outwards, including preparation, base layers, reinforcement and final texture.
Approve a representative sample before applying the finish to the whole elevation. The sample should identify the product, colour and texture, and should be considered alongside the retained materials. If the background in the sample differs from the wall, establish which aspects it demonstrates. Do not treat a small colour chip as approval of every detail of a complete rendered facade.
Arrange the application sequence with weather and protection requirements in mind. Another trade may want immediate access or completion, but the product conditions still apply. The project manager should know what can proceed during a delay and what must wait. This is easier to manage when rendering has a defined handover and inspection plan rather than being the flexible final task in every programme revision.


Keep a short readiness record
A useful record contains the elevation drawing, background description, resolved defects, junction details and the agreed system. Add sample approval and the date the wall was accepted for the next stage. The document can be brief, provided it identifies actual decisions rather than repeating a generic checklist with every box automatically marked complete.
Commercial rendering and new-build developments may need this process repeated across several elevations or phases. Keep each handover tied to the correct area. Acceptance of one wall should not be treated as acceptance of every block on site. For a domestic extension, the same approach can be simpler but still prevents misunderstandings between builder, renderer and homeowner.
The Mansfield rendering overview links the finishing options with repair and insulation work where the project extends beyond new masonry. Choose the relevant service from the known construction, then use the readiness record to establish what remains unresolved. That gives the rendering stage a realistic start condition and leaves a useful record beneath the eventual colour and texture.
Common questions
Can the builder sign off every wall at once?
Only if the record actually covers all those walls and the relevant inspection has been completed. On a phased project, different elevations may be at different stages or contain different materials. Use elevation references and list outstanding items explicitly. A whole-site statement is less useful than a short record showing which backgrounds were accepted, when they were inspected and what preparation remains within the rendering package.
What if the finish product changes after the handover?
Review the substrate acceptance against the replacement system. The original decision relied on a particular specification and may not support a different product or build-up. Confirm the preparation, junction and application requirements before proceeding. Keep the approved change with the handover record, then check whether the sample and programme also need revision. A similar colour or marketing description is not evidence that two systems have identical requirements.
See housing and planning information for Mansfield and nearby places, including the source and geography behind each figure.