External wall insulation in Mansfield
External wall insulation in Mansfield
External wall insulation changes the construction outside the masonry, not just its colour. The proposal needs to bring together insulation, fixings, reinforcement, weathering details and the decorative finish. For a Mansfield renovation, assess that work alongside any planned windows, roof repairs or extension so each trade can work towards the same completed wall.

On this page
Establish the building and the intended system
Begin with a survey of the existing construction and condition. Wall type, previous repairs, moisture problems and the arrangement of openings all affect the design. An insulation layer should not be used to hide a defect whose cause remains unresolved. Ask which investigations support the proposal and which parts of the building remain inaccessible or uncertain.
The specification should name the complete system and explain why it suits the project. Insulation material and thickness are only part of it; fixing, base coat, reinforcement, finish and junction details also matter. Avoid comparing proposals solely by thickness or by a claimed saving. This guide does not publish estimated energy reductions for an unassessed property because the building and its use determine the outcome.
Where only some elevations will be insulated, the design needs to explain the transition to the others. That interface affects appearance and building performance. The whole-house rendering scope may include uninsulated walls alongside the retrofit, but the two types of work should remain clearly identified. A common top-coat colour does not make their underlying construction equivalent.
| Interface | Decision needed before installation |
|---|---|
| Windows | Frame position, reveals, sill and drainage |
| Roof edge | Allowance for the finished wall thickness |
| Base | Ground, drainage and termination arrangement |
| Fittings | Relocation, support and later maintenance |
| Inspections | Who accepts stages before they are concealed |
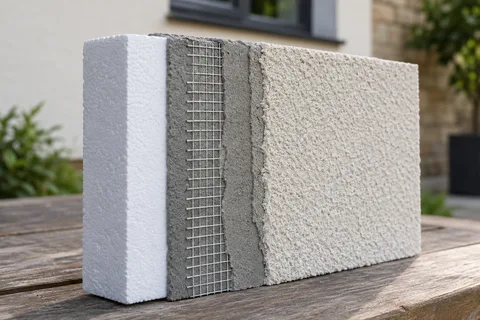
- Existing wall Prepared; fittings removed and the base track fixed above ground level.
- Insulation boards Bonded with adhesive and, in most systems, mechanically fixed to the wall.
- Basecoat with mesh Reinforcement mesh embedded across the board joints and around openings.
- Primer Where the system requires it.
- Finish render A thin-coat finish that weatherproofs the insulation.
Wall on the left, finish on the right. Not to scale: coats, thicknesses and primers follow the chosen manufacturer’s system and the condition of the wall.
Resolve existing defects before enclosing them
Record the condition of render, masonry and rainwater details before installation. Loose or incompatible material may need removal, while some sound backgrounds can be retained under a supported specification. The decision should follow assessment of the actual wall and the selected system. Ask how the substrate is accepted before insulation covers it and which checks will be recorded.
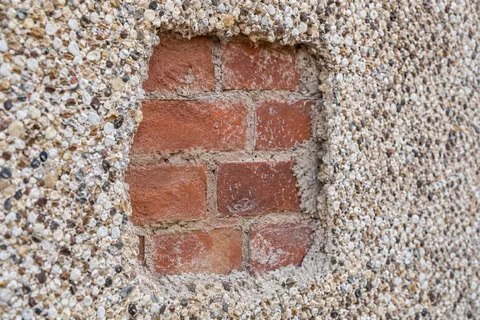
Pebbledash removal can reveal mixed masonry and old repairs that affect the installation detail. Where opening up changes the assumed background, review the design before continuing. Render repair may form part of the preparatory work, but its materials and curing need to suit the system. A repair chosen only to make the surface look flat is not enough evidence of suitability.
Water defects need their own correction. Leaking gutters, defective sills and inappropriate ground details should not remain unresolved behind or above the new system. Agree the responsible trade and inspection point for those tasks. If another survey is needed, include it before the installation programme is fixed rather than treating it as an inconvenience once materials arrive.
Coordinate replacement windows from the start
Insulation changes the relationship between the outside face, window frame and sill. A window selected for the existing wall may need a different junction when the wall becomes thicker. Coordinate the window position, reveal design, sill projection and drainage with the insulation designer. The answer should be visible in the drawings, not left to a last-minute choice of trim on site.
Decide the work sequence and handover between trades. If replacement windows are planned, ask how they are installed and checked before the adjoining system is closed. If existing windows remain, assess whether their condition and details support the proposed work. Replacing them soon afterwards can disturb completed insulation and render, so the likely sequence belongs in the initial discussion.
Ventilation and other functional openings must remain effective. The project may require advice beyond decorative rendering, depending on the building and proposed retrofit. Do not reduce a coordinated design to an instruction to cover everything except the glass. Each penetration and opening needs the appropriate detail, and the parties responsible should know who inspects it.
Check the available space at roof and ground level
The outer wall face moves outwards, which can affect eaves, verges and wall-top details. Measure the existing arrangement and show the finished construction. If roof work is required, include it in the programme and responsibility schedule. A short existing overhang should not be assumed sufficient because the insulation board can physically be fitted beneath it.
At the base of the wall, coordinate the system with ground levels, drainage and the building's damp-control details. Side passages, steps and boundaries may restrict the available space. Establish ownership and access arrangements where the work approaches neighbouring land. A drawing of the thermal layer does not resolve the practical or legal boundary on its own.
Pipes, cables, lights and other attachments may need moving. Their finished fixing and maintenance access should be specified before installation. Some fittings need support designed for the underlying construction and insulation system. Simply using a longer screw after completion can create damage or an unsuitable load path. Keep a schedule of what is removed, altered and reinstated.
Inspect concealed stages and retain the records
Agree inspection points for substrate preparation, fixing, reinforcement and important junctions before they disappear beneath the finish. The system designer and installer should define the relevant evidence. Photographs need locations and dates so they can be understood later; a folder of close-ups without an elevation reference may not demonstrate which part of the wall they show.
Silicone rendering is one possible decorative finish within an appropriate system, but the finish must be part of the supported build-up. Approve its texture and colour on a representative sample. Commercial rendering projects may add coordination with building users, deliveries and other trades, making the inspection and handover schedule particularly important.
At completion, keep the system specification, relevant installation records, care guidance and details for future attachments or repairs. INCA's maintenance guidance explains why alterations to EWI require appropriate treatment. If the wall is damaged later, identify the affected layers before arranging a repair. A small visible hole may involve more than the outer decorative surface, and the repair needs to restore the system properly.
Common questions
Can lights and pipes be put back with their old brackets?
The new wall thickness and system design determine the appropriate support and fixing detail. Record each attachment before work and agree its reinstatement. Reusing an old bracket or choosing a longer fixing without checking the system can leave an unsuitable arrangement. Future maintenance access should also be considered in the design.
See housing and planning information for Mansfield and nearby places, including the source and geography behind each figure.